
Homemade SiC LED
by SV3ORA
This page demonstrates the process of making a practical homemade indicator LED. For a long time I thought that making active components from scratch, was an impossible thing. How wrong I was. The galena diode detector dates back in the early days of radio. The LED dates back in that age too! This is my first (actually second, after the galena) attempt to make a semiconductor. And it is a LED!
All that is needed, are a few components that can be found in any home and some pieces of SiC. These can be found very cheap on ebay. A small piece of SiC can make dozens of LEDs.
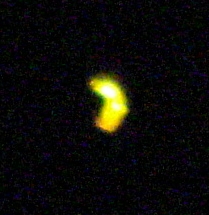
First you have to select the right SiC crystals for your LEDs. Take the piece of SiC and carefully brake it into tiny pieces, small enough to be able to handle them with a tweezers. Find a metal surface (not anodized) and place some of these pieces on it. Connect this piece of metal to the positive rail of a 10V-15V power supply. Connect the negative of this power supply to a needle. Hold each piece with the tweezers and make sure it makes a contact with the metal surface below it. Then point the needle onto the SiC piece and find an area that gives a good amount of light.

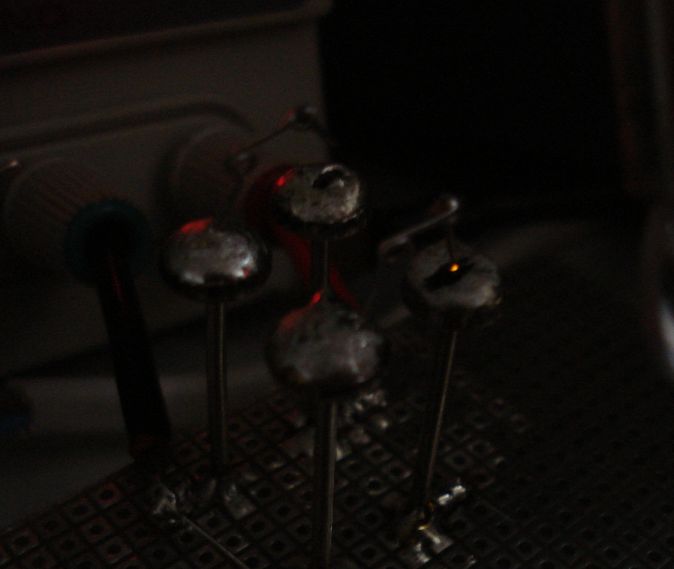
After you find a good SiC crystal, you have to mount it steady somewhere. For this purpose, I use a nail with a big head (which serves as a heat sink as well).
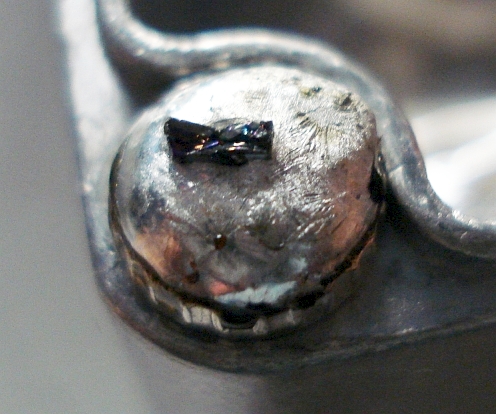
Place a good amount of solder onto the nail head and keep it melted with the soldering iron. As the solder is melted, throw the SiC crystal in, using the tweezers and make sure that the top of the crystal, contains the point that produces the light. You may have to push the crystal a bit into the solder, until the solder fills the crystal around. When the iron is removed and the solder is cooled, the crystal must be mounted steady onto the solder. If not, you can repeat the above process many times, as the solder does not react with the SiC crystal.
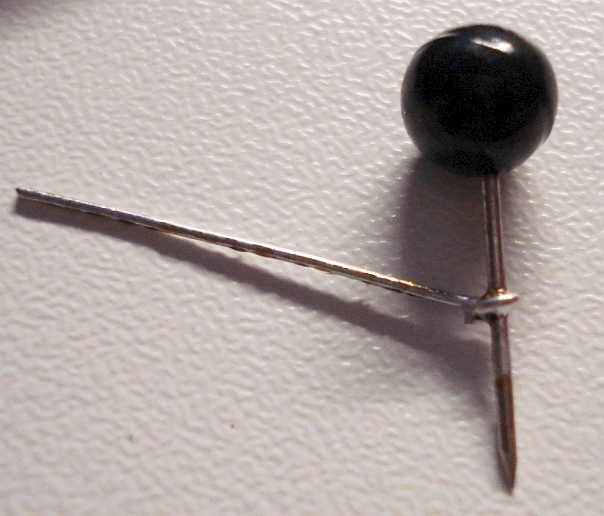
The next thing, is to make the point contact part. Take a needle and wrap around a small solid core wire. I used the leads out of a 1/4 Watt resistor as a wire. Solder the wire onto the needle and cut the needle unwanted part, as shown in the pictures.

Make a small loop on the wire to create a spring-like construction and solder it's one end onto another nail, placed close (but not touching) to the nail that holds the crystal. The whole construction must be arranged as shown below.

The two nails are soldered onto a proto-board, but it is recommended to use a thick piece of copper or other metal and solder them onto it for best rigidity.
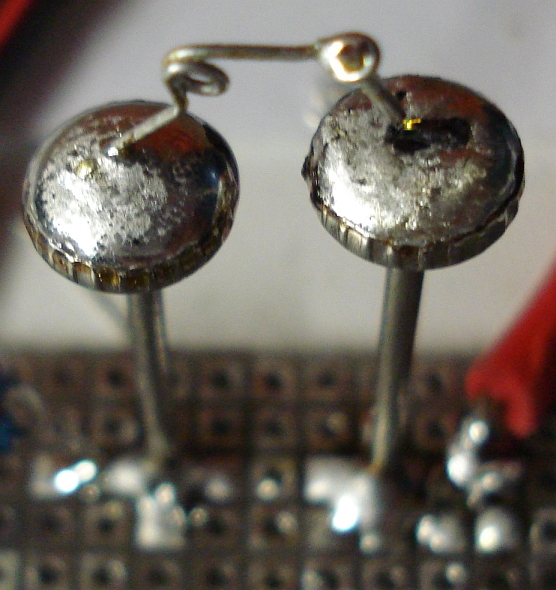
The last thing is to bend the spring wire so that the needle points to the SiC crystal area that produces the light.
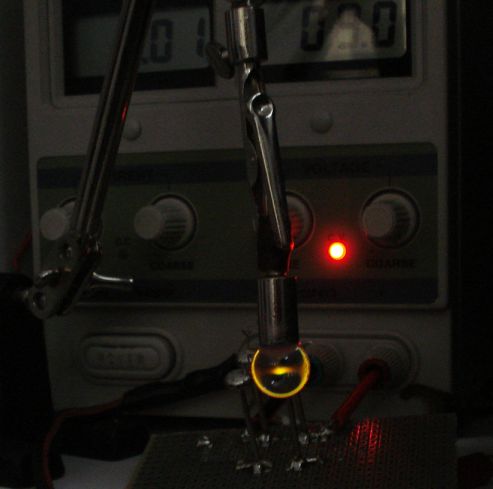
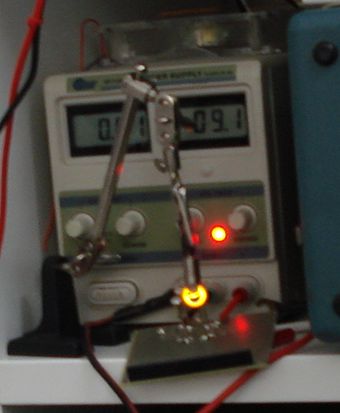
I found the best operating point for the LED to be around 9V. The LED then draws about 10mA. This point gives good brightness and does not warm up the LED too much. Just to make sure that a diode had been formed, I reversed the power supply terminals and then no light was produced.

To make sure that the process could be repeated many times with the same results, I made a second LED as well. The results were exactly the same. Also, the second LED took me only 10 minutes to make.


Making LEDs this way is really easy and cheap. Nevertheless, if you could suggest a more rugged or easier way, I would be happy to try it.
UPDATE 26-5-2013
More experiments with the SiC LED
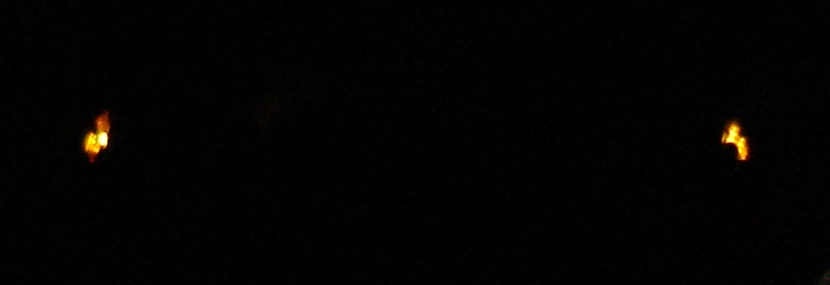
The
homebrew SiC LEDs are very dim. You can easily see the LED on from a
vew cm away but, it can not be easily seen from more than 1m away,
unless there is total darkness. Increasing the voltage did not improve
brightness significantly.
A
simple way to improve visibility, is to use a magnifying lens at a
distance in front of the LED crystal. Picture below, shows a lens taken
out of a small binocular, placed about 1-2cm in front of the SiC
crystal. The picture has been taken about 0.5m away from the LED.
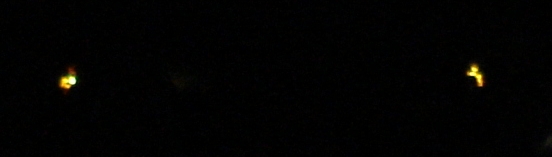
You
can notice the magnifying image of the light point at the center of the
lens and also a light circle at the perimeter of the lens. Picture
above compares the brightness of the SiC LED using the lens, with the
commercial red PSU LED just above it.
As
you go further away the light starts to fill the whole lens. You can
also make this effect at smaller distances as well, by adjusting the
lens spacing from the crystal accordingly.