The Jupiter Ace motherboard
For a long time I was looking for an original Jupiter Ace to buy. These computers seem to be more rare even than the ZX80. Thus, I have decided to build one by myself. There were many other people that have built this computer but no one seems to have used the original PCB layout. There was no PCB layout of the Jupiter Ace motherboard nowhere on the internet, so I have decided to build one by myself.
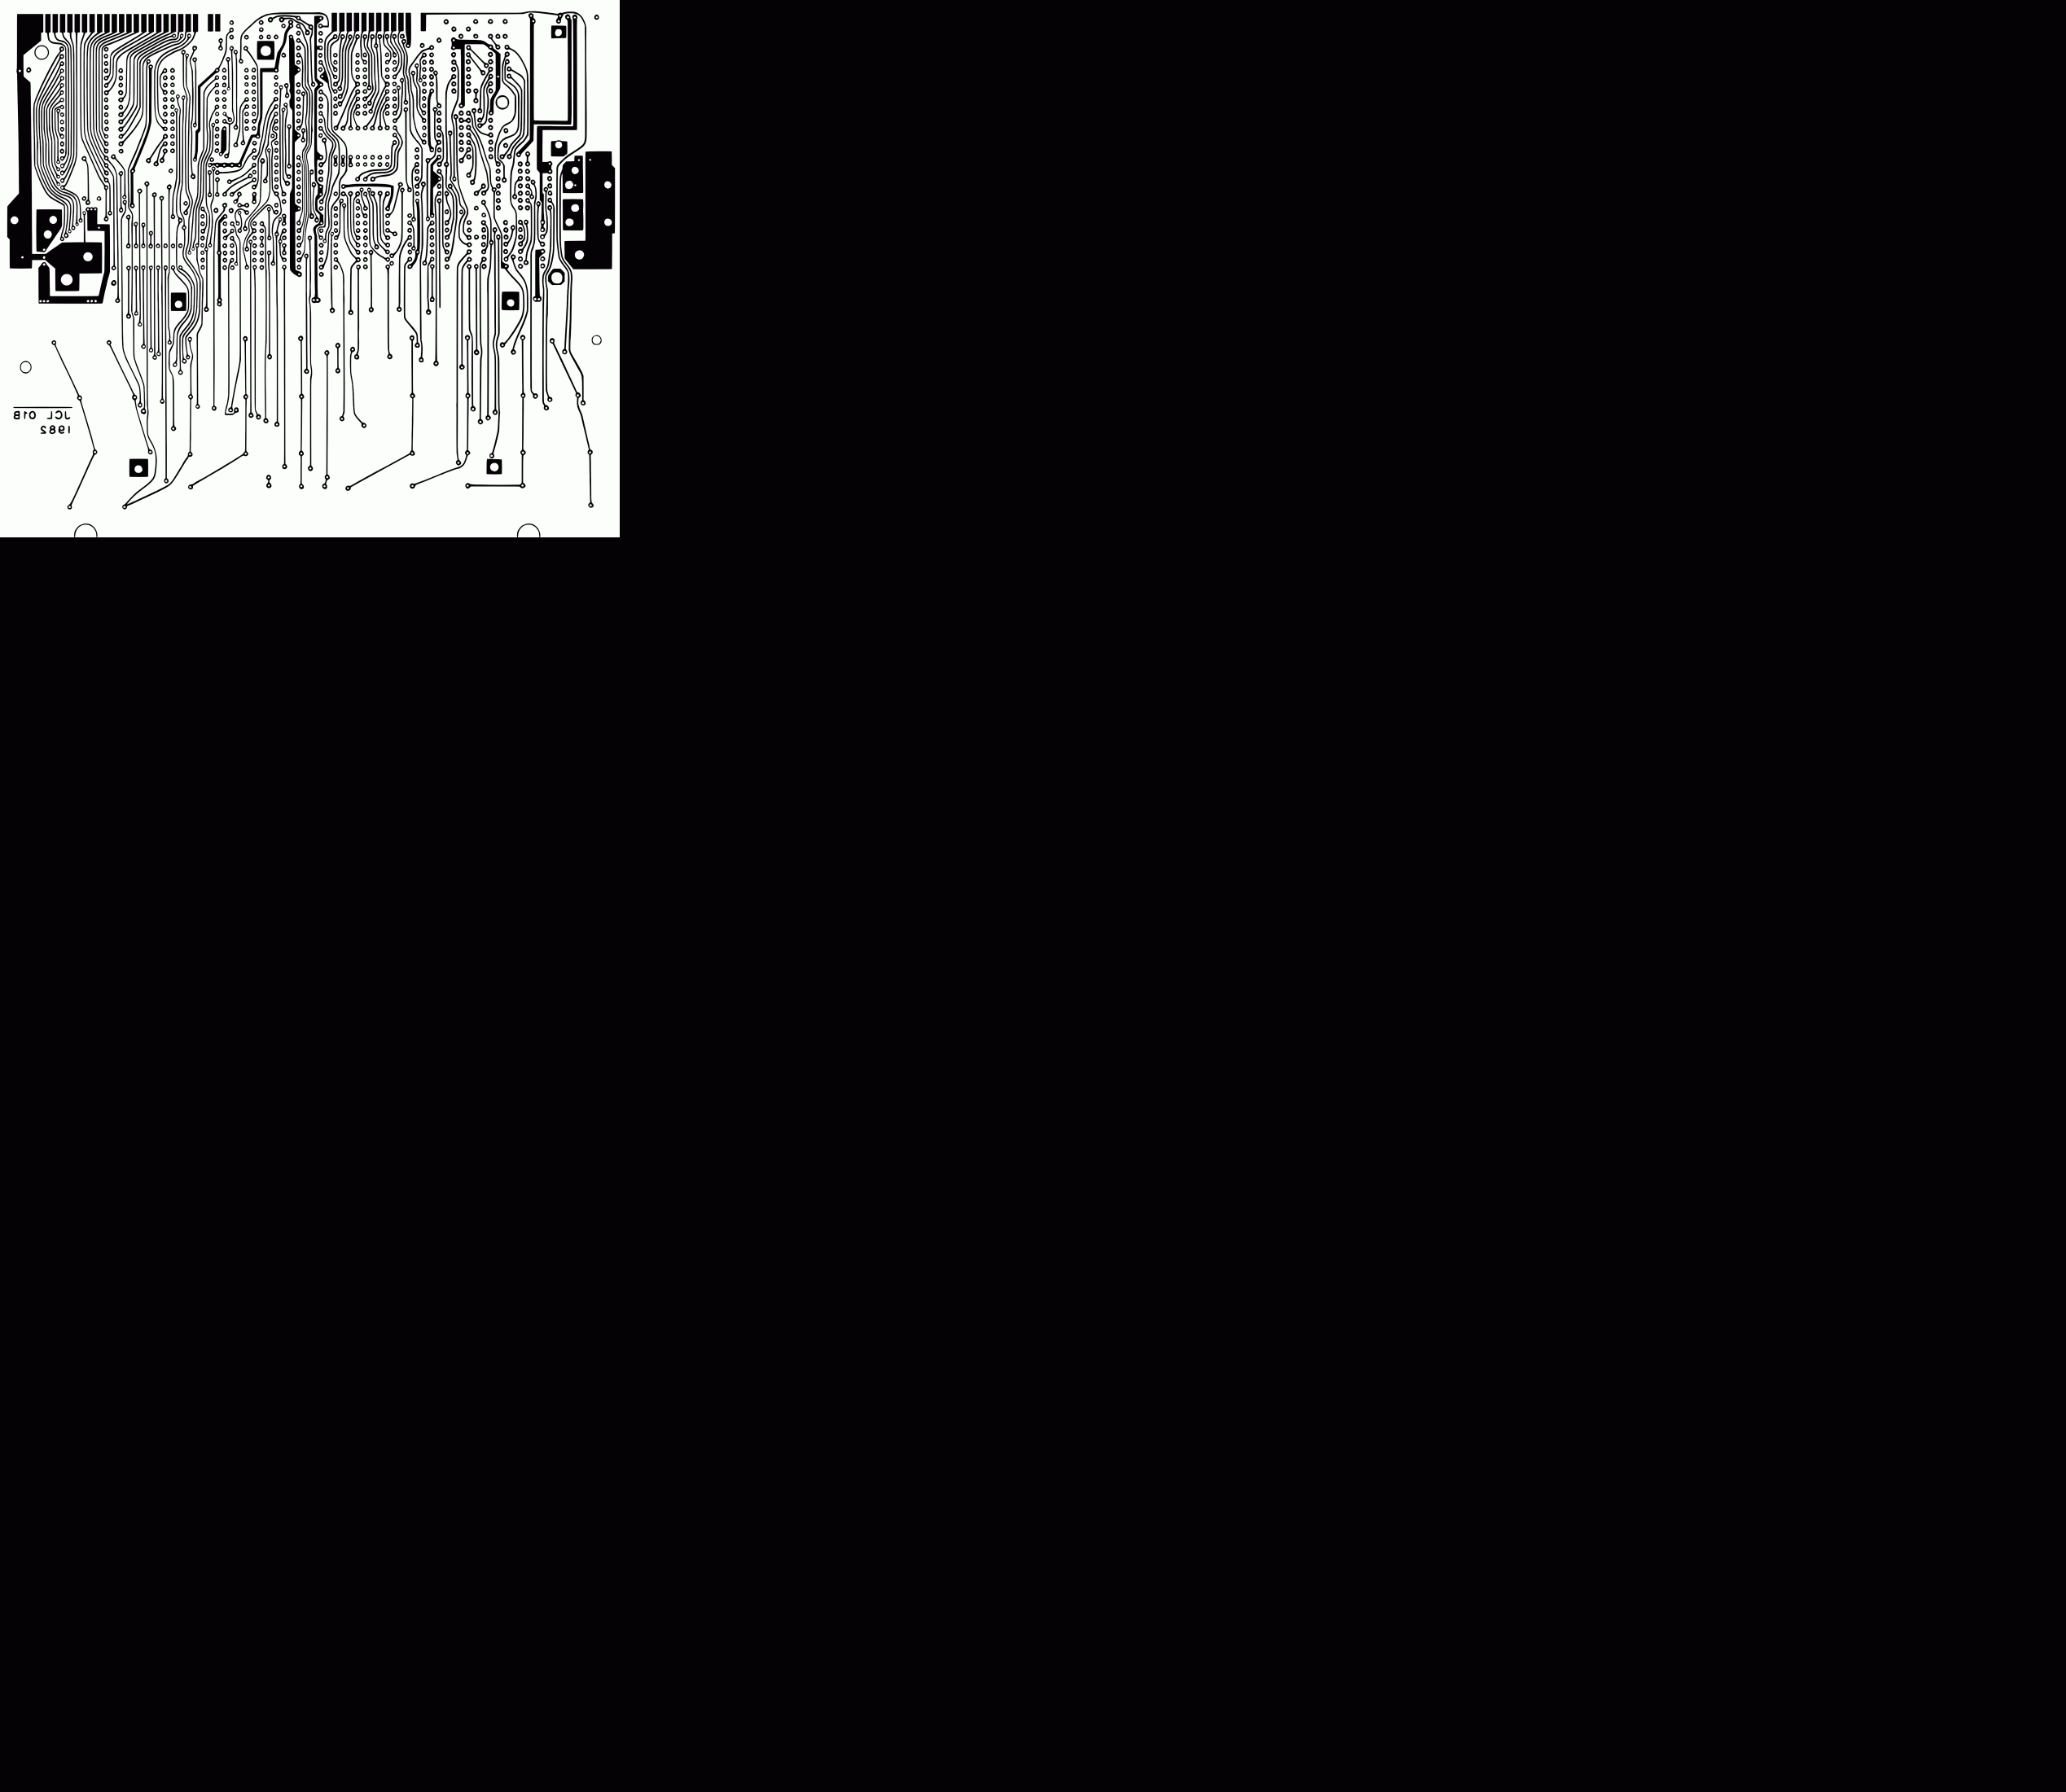
Fortunately, thanks to some great people, I was able to find good resolution scans of the unpopulated issue2 PCB. This motivated me to build this PCB. The work was not easy at all. It took me about a month to convert the scanned images to the final form for printing. The procedure involved tracing the PCB, clearing it, color transforming it and correcting the pads holes. All these had to be done on both sides and care had to be taken so that the holes on both sides do not misalign too much. I present my work below
Motherboard top layer (Not scaled, 16Mb full resolution BMP image)
Motherboard bottom layer (Not scaled, 16Mb full resolution BMP image)
Motherboard top layer (Scaled, ready to print on landscape)
Motherboard bottom layer (Scaled, ready to print on landscape)
A little copyright notice here: I provide these images for free for anyone interested to build this computer. The only thing I require is that if you use them or re-distribute them on any website, you should provide a link with the source that you have taken then, which is this current page. A credit to me, is the payment for my effort and time on these. This applies to all images and content of this page. Thank you very much.
The original board modifications
Here, I am going to modify the original board a bit. Some things could be implemented better than the original Jupiter Ace, but still keeping the vintage look and feel of the PCB layout.
Jupiter Ace ROM select [ROMSL] Modification
I keep a local copy of
this modification here.
The ROM select [ROMSL] signal is missing from the edge connector of the standard
3K Jupiter Ace. On the Ace4000 its been added to the first unused edge connector
pad, next to the key on the solder side of the pcb.
The ROMSL signal can be connected directly to the 5+ volts to disable the Ace's
Forth ROMs. This will allow other interfaces and devices to take control with
their own on board ROMs. In The following modification the ROMSL signal is added
to an unused edge connector pad next to the key on the solder side of the Ace's
pcb, the same as the Ace4000.
This modification originally is done by cutting traces adding components and joint other points on the PCB. In my version this is all embedded onto the PCB. To help you see what the modified areas are, I have made two animated gifs. For some strange reason these gifs consume a much larger area on the page than their size, so keep scrolling the page down.

The relevant PCB files that include this modification, are presented below:
Motherboard top layer (Not scaled, 16Mb full resolution BMP image)
Motherboard bottom layer (Not scaled, 16Mb full resolution BMP image)
Motherboard top layer (Scaled, ready to print on landscape)
Motherboard bottom layer (Scaled, ready to print on landscape)
If you examine the original modification and the animated images it would be easy to figure out where the 4 components are soldered on the PCB. The two resistors are soldered on the lower part, whereas the two diodes are soldered on the upper part.